Want to capture high-quality overhead shots for cooking videos, craft tutorials, or flat-lay content — without investing in expensive gear? You're in the right place.
In this guide, we'll walk you through 4 easy ways to get a clean, top-down shot using your iPhone, the Detail app, and a few simple accessories. These options are beginner-friendly, budget-conscious, and perfect for solo creators.
What you need
Before we dive into the setups, here's what you'll need:
iPhone with the Detail app installed
iPad (optional) — use it as a wireless monitor and remote controller via the Detail app
One of the 4 mounting setups listed below
A flat shooting surface (like a table or countertop)
Good natural lighting or a softbox for clear visuals
Why use the Detail App?
The Detail app allows you to connect your iPhone and iPad, so you can:
See your live camera feed on your iPad (perfect for checking your framing)
Start and stop recording remotely
Avoid running back and forth during solo shoots
This saves time and gives you full control over your shot — especially useful when your camera is mounted overhead.
4 easy overhead setup options
1. The $30 Overhead Tripod (Best Budget Option)
Setup:
Mount your iPhone into a budget-friendly overhead tripod (available online for ~$30)
Position it directly above your table or workspace
Pros:
Affordable
Easy to use
Cons:
Limited height
Less stable than other options
Result:
A tight, zoomed-in shot — great for close-up content
2. MagSafe Mount + Standard Tripod
Setup:
Attach a MagSafe mount to a regular tripod
Tilt the phone downward to get as flat an angle as possible
Move the tripod close to the table to reduce distortion
Pros:
Quick to set up
Slightly more height than a small overhead tripod
Cons:
Not a perfect 90° overhead angle
Result:
A flexible mid-range option with decent framing
3. Mic Stand + Phone Holder (Top Pick!)
Setup:
Use a microphone boom stand with a phone holder attachment
Position the stand so the phone is suspended directly overhead
Pros:
Super stable
Adjustable height and angle
Great overhead framing
Cons:
May require an adapter for your phone mount
Result:
Wide, clean top-down shot — perfect for tutorials and demos
4. Selfie Stick (Most Portable Option)
Setup:
Extend your selfie stick and angle it downward
Attach your phone using the back camera
Position it above your workspace or prop it between two surfaces
Pros:
Lightweight and portable
Budget-friendly
Cons:
Slight tilt (not a perfect flat angle)
Less stability
Result:
A solid makeshift setup when you're on the go
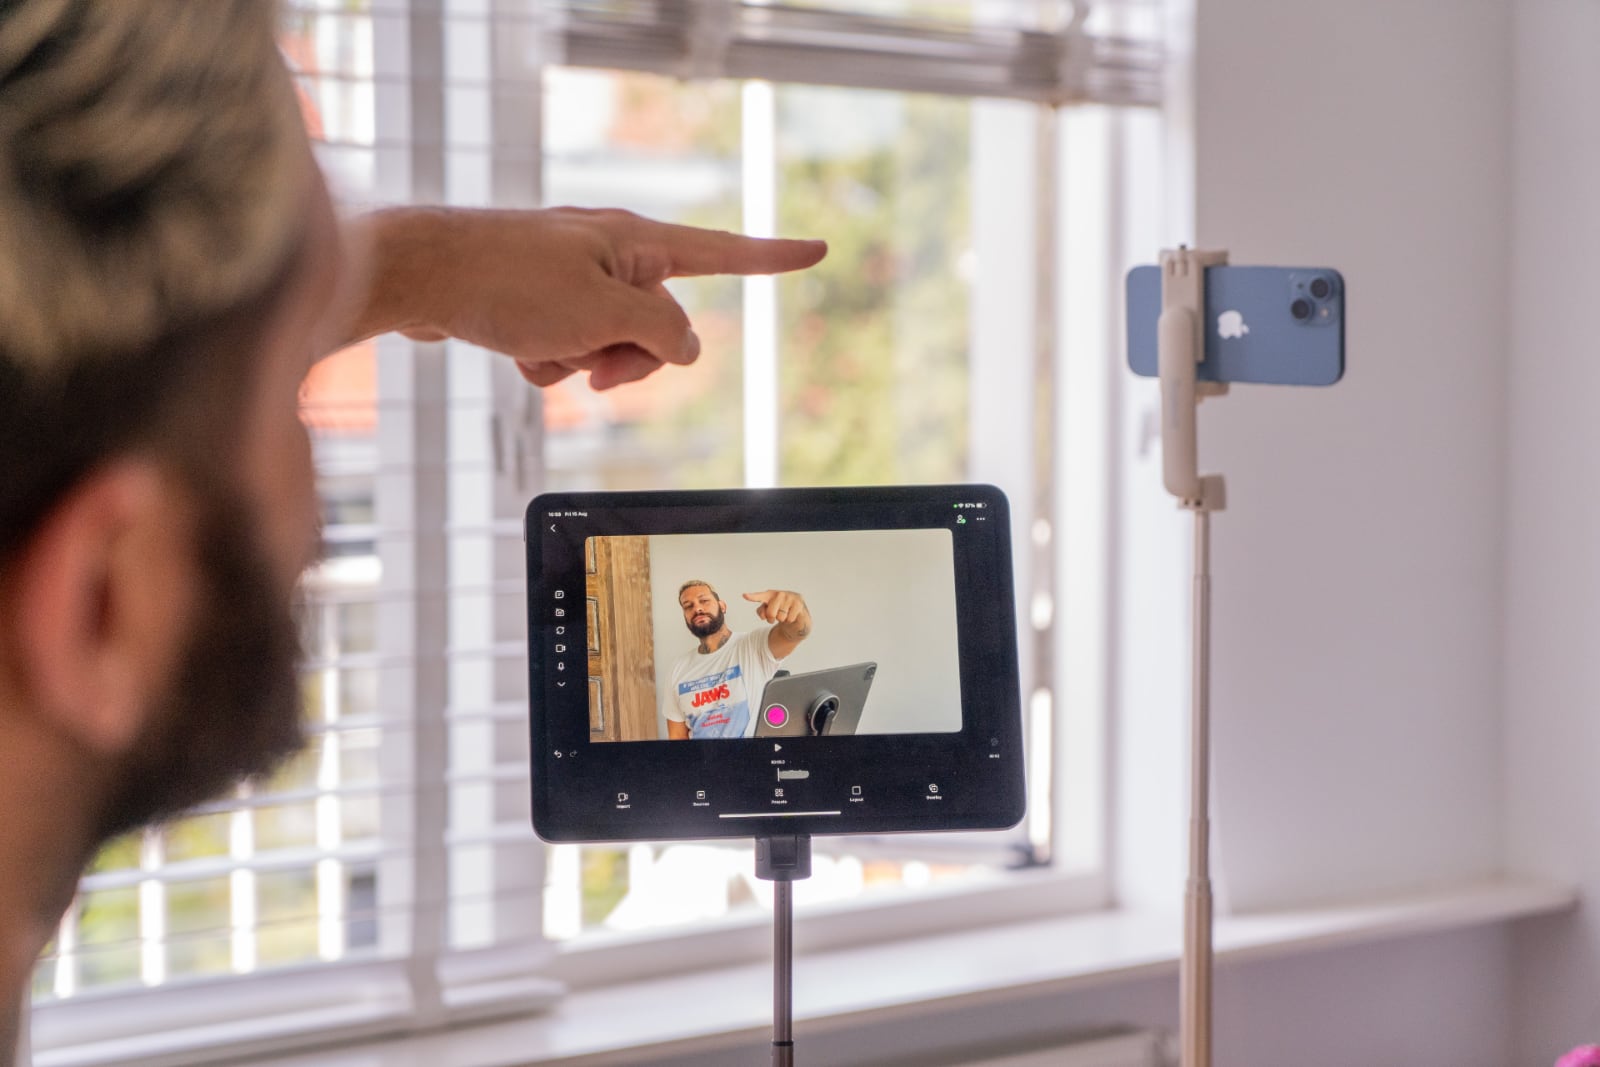
Pro Tip: use your iPad as a live monitor
Once your camera is in position, connect your iPhone to your iPad using the Detail app. You’ll be able to:
Preview your shot in real time
Adjust framing without moving the phone
Record directly from your iPad
This is especially helpful for solo creators who need to stay in frame without constant re-checking.
Final thoughts
You don’t need fancy gear or a full studio to film great overhead content. With your iPhone, the Detail app, and one of these four simple setups, you’ll be able to:
Capture clean, professional-looking top-down angles
Shoot solo with ease
Create compelling cooking, crafting, or tutorial videos